About this guide
This guide will lead you through the process of setting up EBANX as a payment gateway on your Shopify store as well as covering some additional items such as Digital Marketing data and common troubleshooting scenarios.
Availability per Country
Transparent checkout is a game-changer for merchants operating in Latin America using Shopify’s platform because it enables them to sell in the way that people in our region most like to do: feeling safe. Therefore, with a seamless checkout solution you’ll be able to achieve higher payment conversion rates and less checkout abandonment rate.
The following table details which Checkout experience is available for each country we process in Shopify.
| Country | Checkout Type |
|---|---|
| Brazil | Transparent Checkout * |
| Mexico | Transparent Checkout * |
| Colombia | Transparent Checkout * |
| Chile | Transparent Checkout * |
| Argentina | Transparent Checkout * |
| Uruguay | Transparent Checkout * |
| Peru | Redirect Checkout |
| Ecuador | Redirect Checkout |
| Bolivia | Redirect Checkout |
How it works
Follow the steps below to setup EBANX as your payment provider on Shopify:
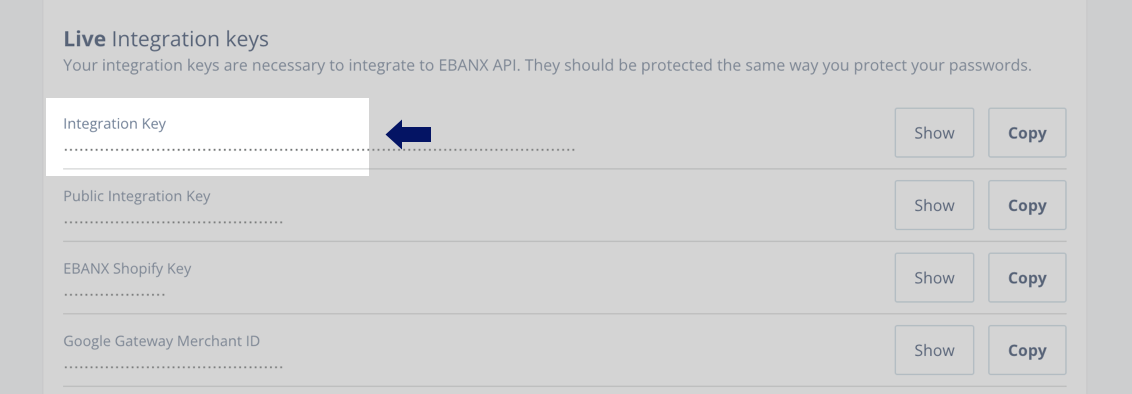
Get your Integration Key
To install the EBANX Payment App you’ll need to get your Integration Key, available at the Integration section of your EBANX Dashboard.
Install and activate EBANX Payment App
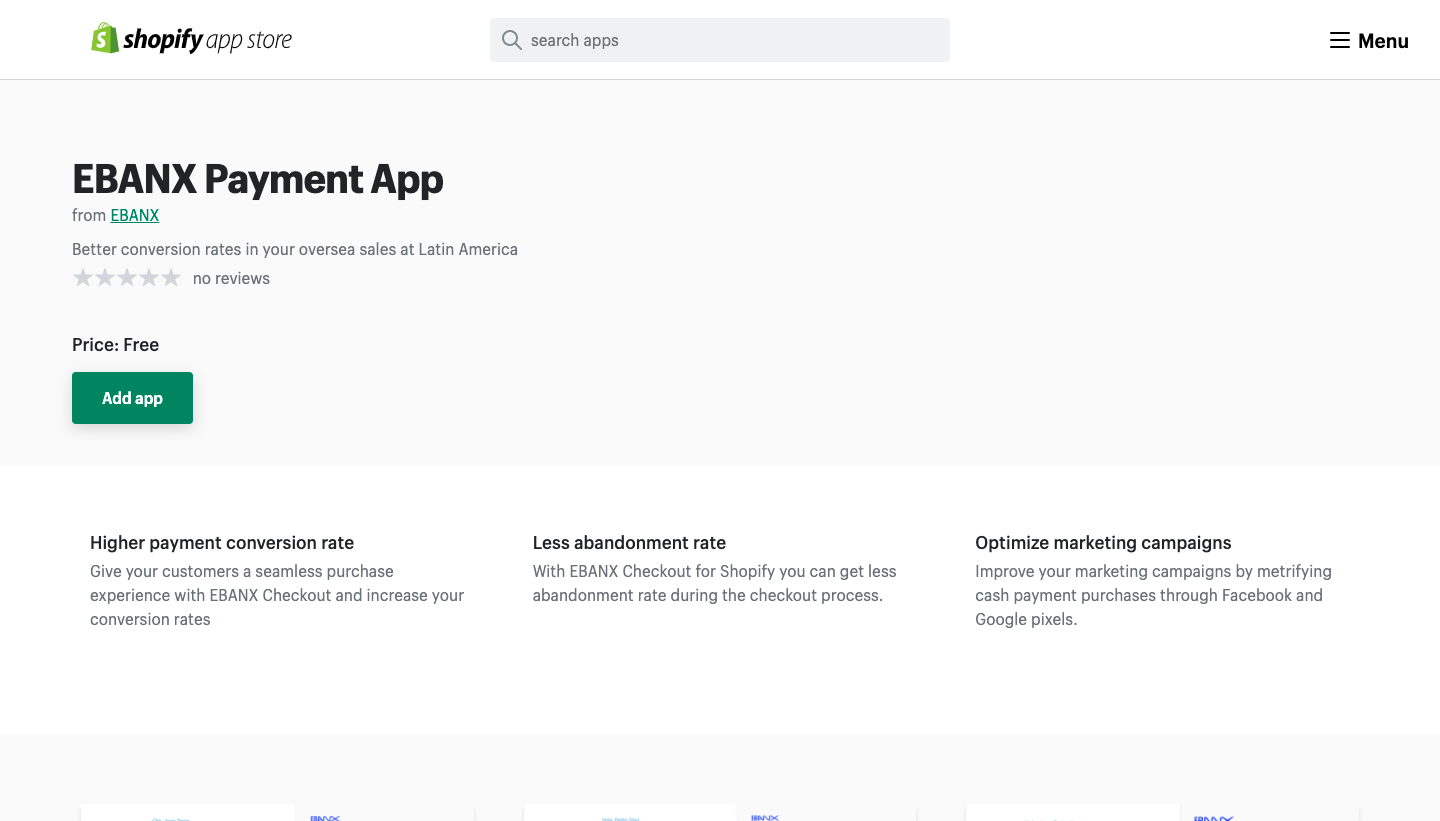
- On EBANX Payment App page click on "Add app" to your store;
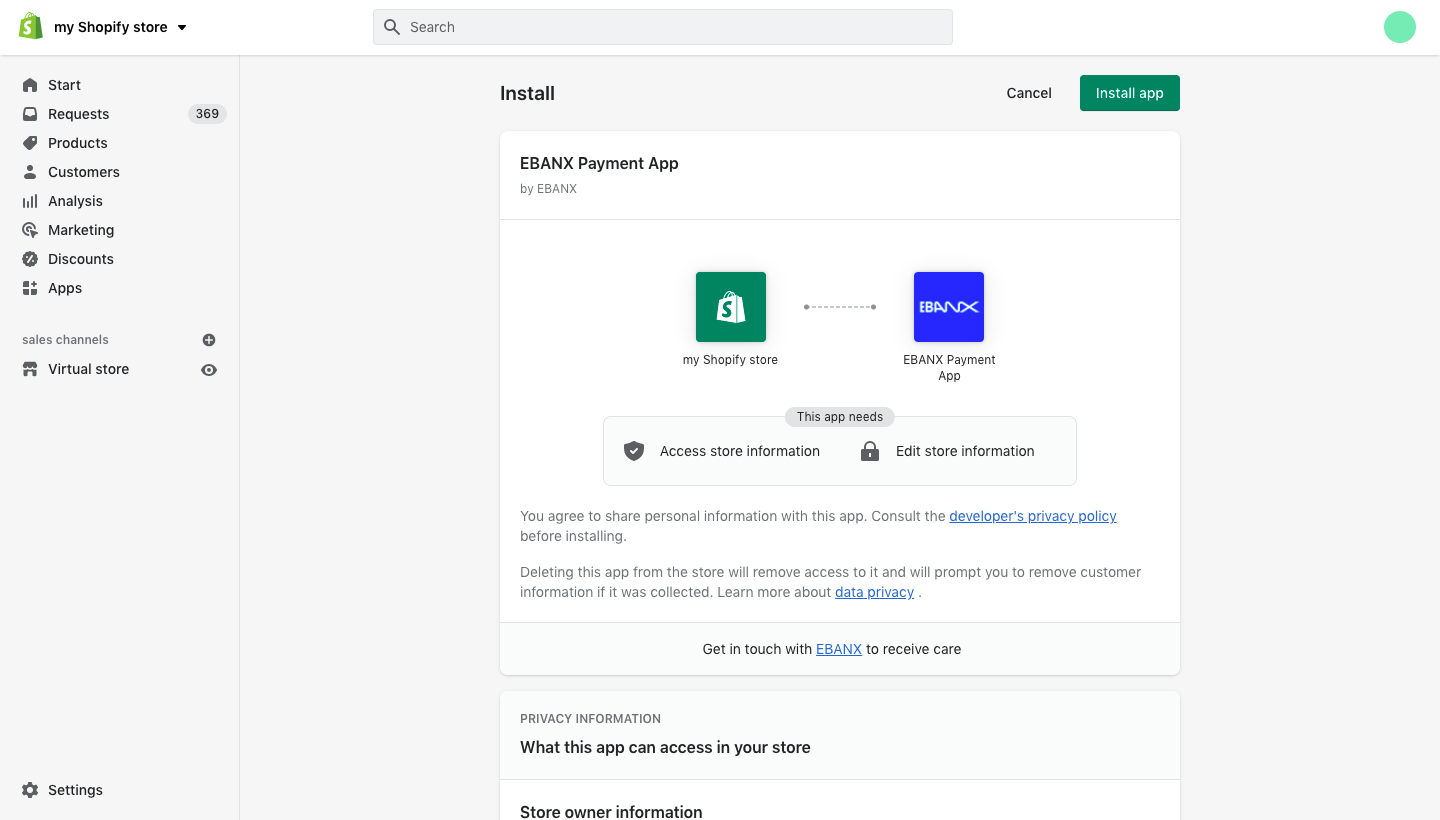
- You'll be redirected to your Shopify administrative panel. Click on "Install app" to proceed;
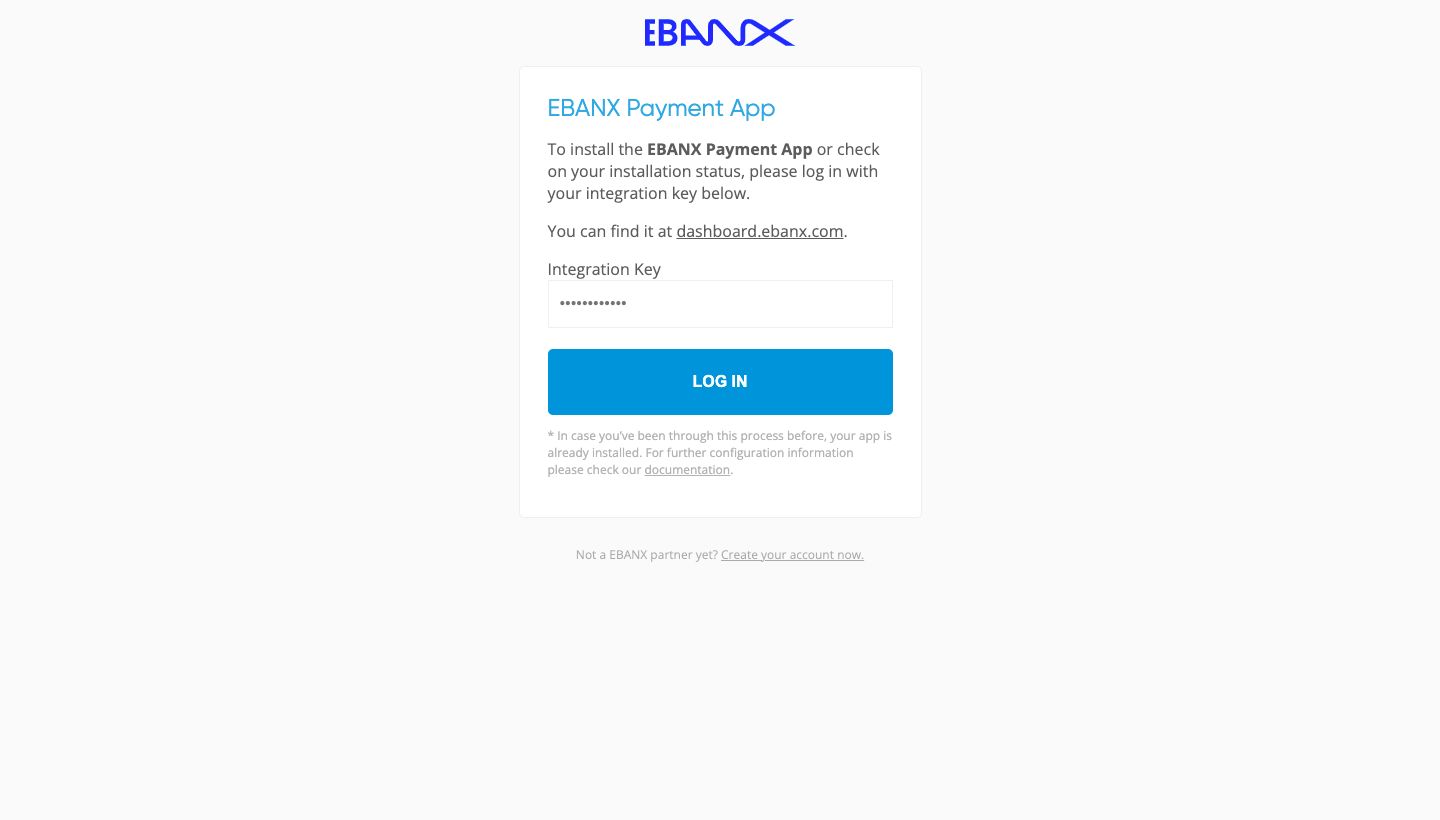
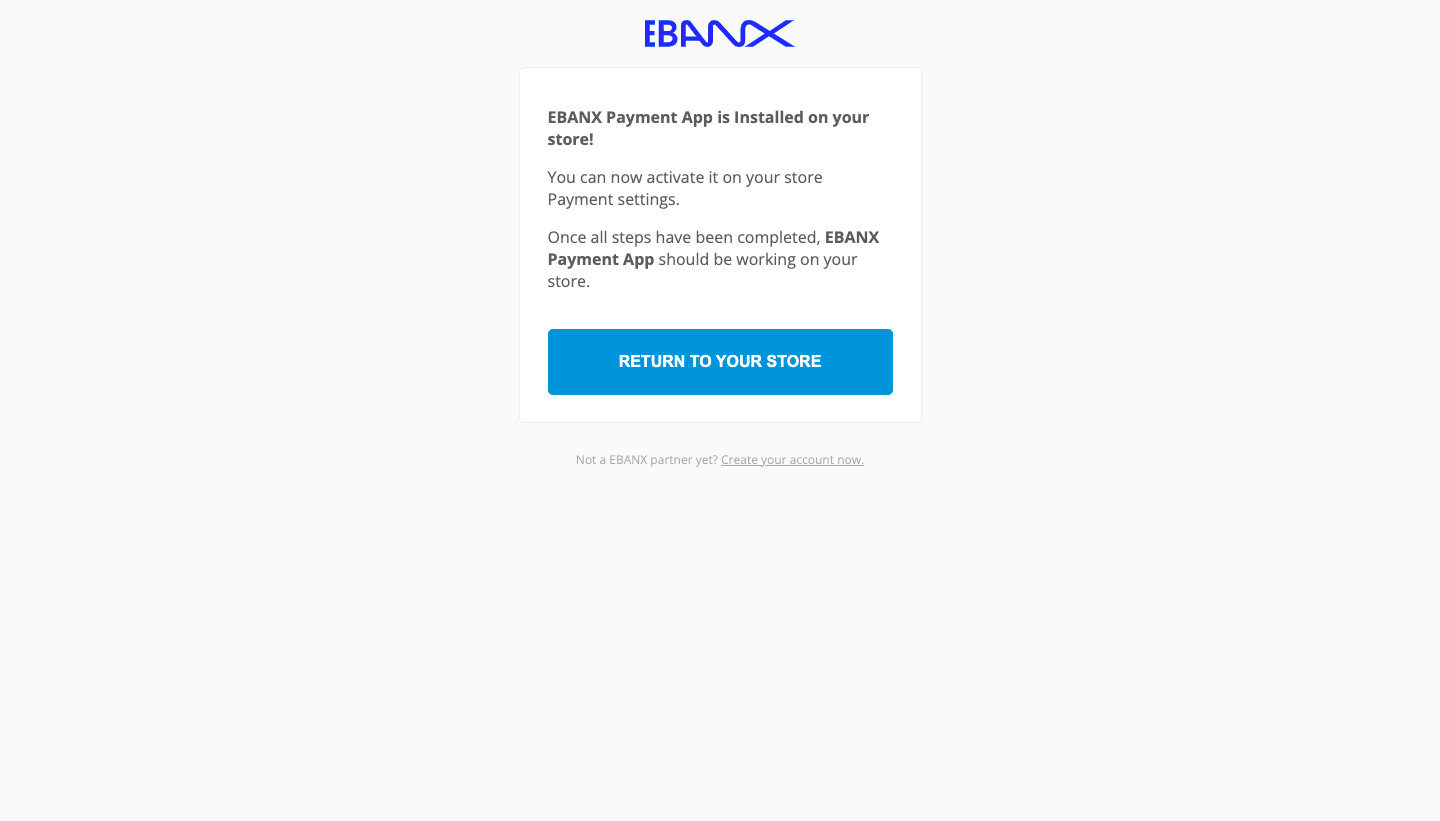
- On EBANX Payment App screen, insert your Integration Key, then click on "Log In";
- Once your installation is confirmed, click on "Return to your store" to be redirected to your EBANX Payment app settings on your Shopify administrative panel;
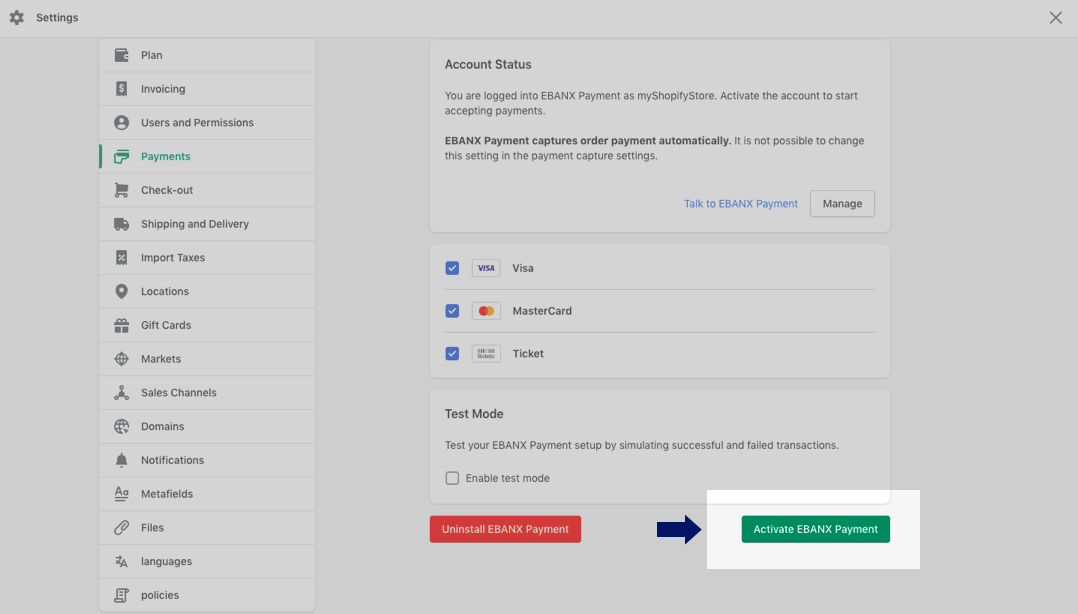
 The path to your EBANX Payment App settings is: “Settings” > “Payments” > "Accepted Payment Methods" > "Manage (on your EBANX Payment app)".
- To activate the now installed EBANX Payment App on your store, click on "Activate EBANX Payment App".
Set up Form Options
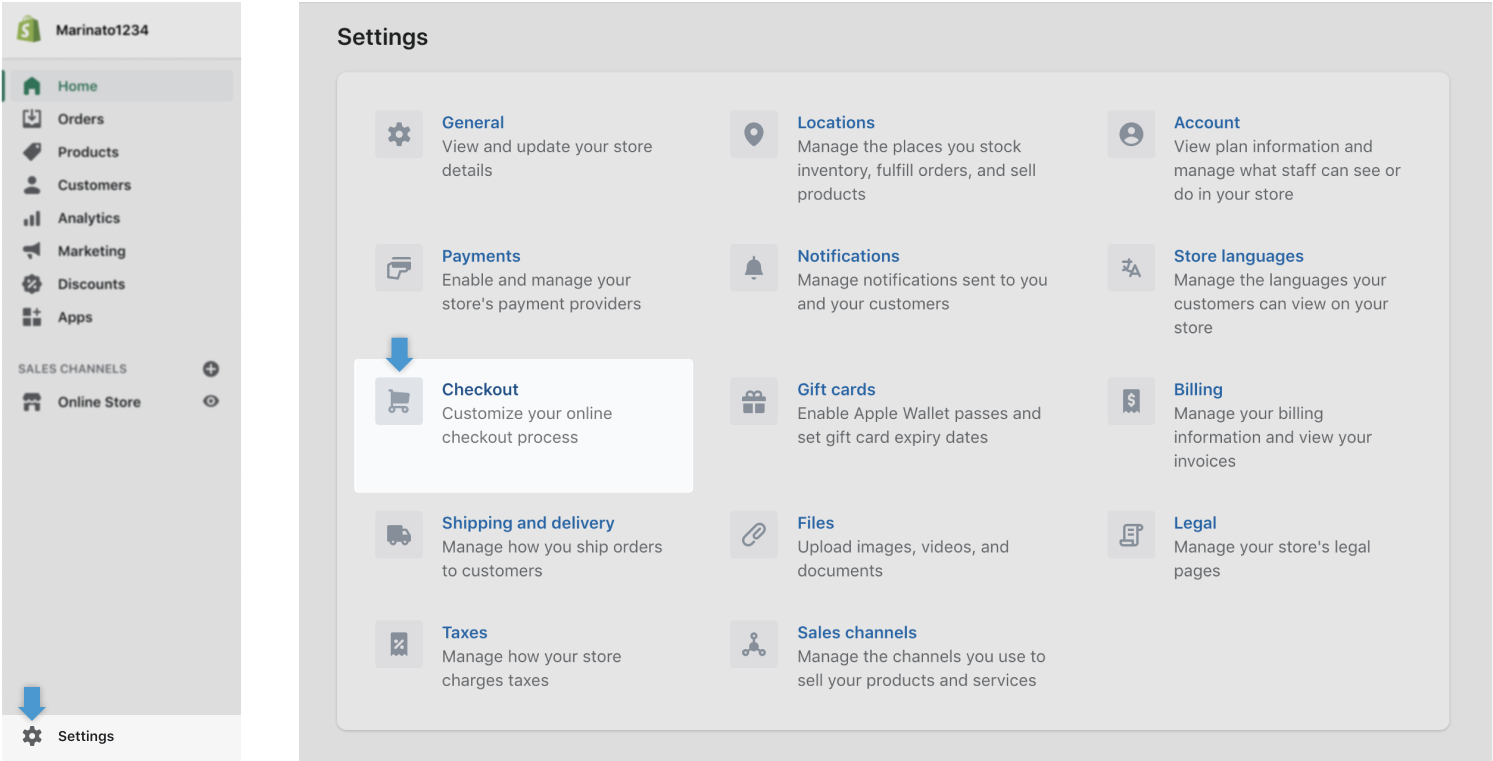
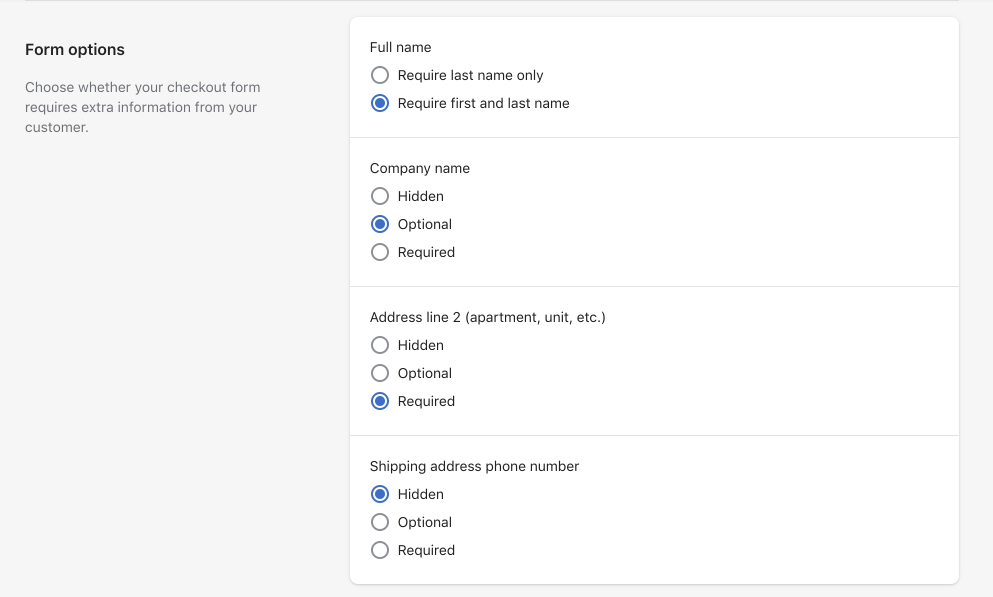
- Click on “Settings” again, then on “Checkout” to set your Form options as the image below and save.
Configuration for selling physical goods in Brazil
info
Important to know: This additional step is mandatory for Brazil. In case your Shopify store does not have this option, you do not need to do anything else at this step.
Since January 2020, the Brazilian Tax Authorities require all imported packages to document the Brazilian customer identification number (CPF or CNPJ). If you sell products that require shipping to Brazil, please follow this last step or else your products won't be properly delivered.
If your store has the Enable CPF/CNPJ field flag already checked, please remove it. Do not worries, CPF/CNPJ will be requested as normally at your checkout.
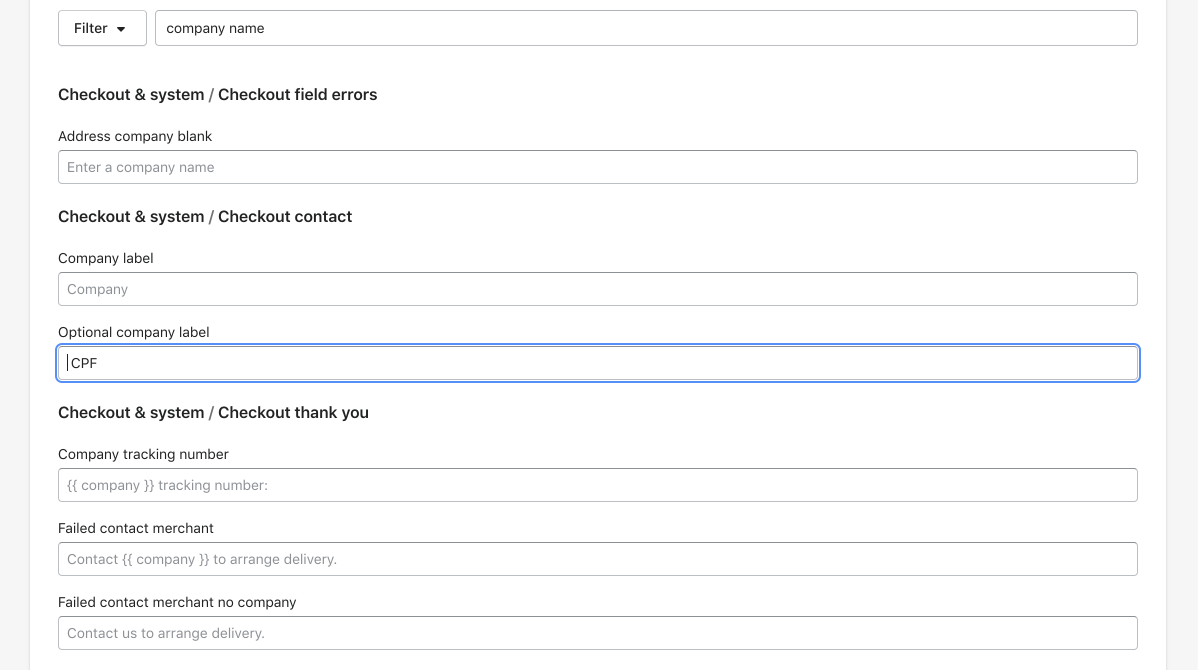
- Stay on the same page (Settings> Checkout), scroll to the bottom of the page. In the Checkout Language configuration click on Manage Checkout Language.

- Change the Optional company label field to CPF and save this page.
Test your new integration
Lastly, access your store and go through a regular purchase flow in order to confirm that the gateways that you’ve just installed are appearing as payment options. In the case they are not, please send an e-mail to integration@ebanx.com asking for support.
Getting help
We hope this article was enlightening, but in case we’ve failed to take out your doubts you have the following options to keep on seeking for answers:
- If you’re not our partner yet and would like to know more about our prices and conditions please fill our this form and our commercial team will get in touch with you.
- In case you’re already our partner please get in touch with our support team at integration@ebanx.com.
- Alternatively, you can check our FAQ at the end of this page for further questions.